Introduction
Before I got my Instant Pot, I always viewed pressure cookers as a relic of the past. Something housewives used back in the fifties for making pot roasts (not that there’s anything wrong with that). If I wanted speed, I’d just use my microwave, right? Well, I’m here to tell you that a modern pressure cooker is an incredibly useful device and can do things a microwave could never do. Whether you’re thinking of buying one or, perhaps, just received one as a wedding gift, let me show you how to use a pressure cooker to up your game in the kitchen.
History
Believe it or not, the pressure cooker has been around for almost 350 years. But it wasn’t until the late 1930s that a practical product was developed for home use. Throughout the 40s and 50s, the pressure cooker enjoyed tremendous popularity, saving harried housewives (and househusbands??) time by being able to prepare dinner in a fraction of the time.
Over the next several decades, popularity began to fade. With many manufacturers producing inferior products, a lack of safety features, and consumer misuse, there were reports of units exploding. Of course, these explosions were more likely to paint your ceiling with tonight’s chicken cacciatore and not launch the refrigerator into your neighbor’s pool. Along with safety concerns, new technologies such as microwave ovens also contributed to slower sales.
Starting in the nineties, more sophisticated electric pressure cookers began to appear on the market. Today’s products are safe, versatile, and loaded with tech. Place the ingredients in the pot, push a button or two, and walk away. Easy peasy.
The Science Behind How They Work
In its simplest form, a pressure cooker is a pot with a locking lid and a valve to control the internal pressure. A small amount of liquid is required for all recipes. The heated liquid turns to steam, with nowhere for the steam to escape, pressure increases, typically to a maximum of 10 – 15 psi (per square inch). At sea level, the boiling point of water is 212°F (100°C), however, because of the increased pressure, it raises the boiling point to as much as 250°F (120°C). This superheated steam transmits thermal energy to the food at a much higher rate than normal, substantially reducing cooking time.
Types of Pressure Cookers
Although there are plenty of models available today, they all fall into one of two categories. Each type has its strengths and weaknesses. Let’s take a look.
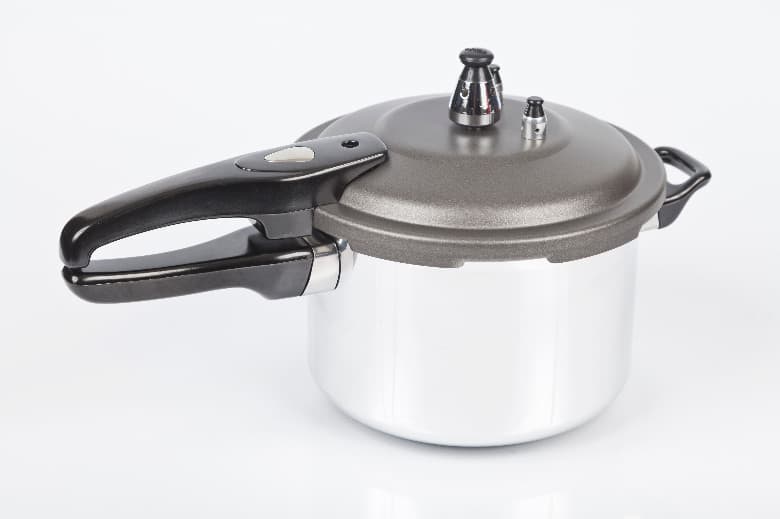
Stovetop
Stovetop pressure cookers are a fairly simple design that’s been around for a long time. A pot with a locking lid, and a valve to control the pressure. That’s it. Because it uses your stove for a heat source and doesn’t have electronics and alarms it’s less expensive than electric units, and can be placed in the dishwasher. They are also a bit faster coming up to pressure, easier to store, and come in a wider variety of sizes. On the downside, they need more handholding since they can’t regulate the heat on their own. You’ll need to stand by to adjust the burner as needed. If the cooker gets too hot, the pressure will build which will cause the pressure valve to release the excess steam. This, of course, is a good thing and will prevent any accidents but can be noisy.
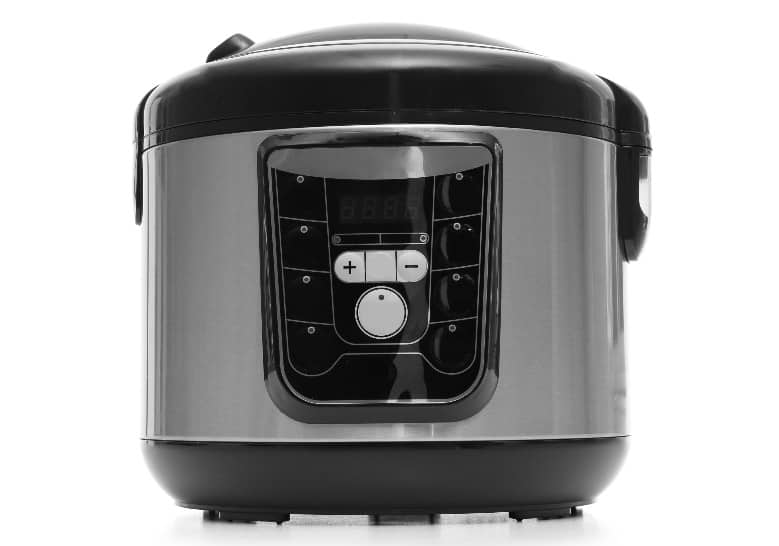
Electric
The electric pressure cooker has become very popular in the last decade or two. The leader in this field is Instant Pot, who has an enthusiastic following (full disclosure, I own one as well). Electric units are easier to use (read the manual first) and very versatile. Many of the most popular models double as slow cookers, can saute and have dedicated programs for cooking yogurt, different grains, eggs, meats, etc. They can also schedule start times and automatically keep the food warm after cooking. They’re a bit slower than stovetop units, bulkier to store, and more expensive. I bought my electric cooker because I wanted to be “hand-off”. Load it up, push a button, and get on with my life.
Advantages & Disadvantages
So far I’ve told you how pressure cookers work, the different types, and even a brief history. But with all the other appliances competing for your countertop space, let’s discuss what a good pressure cooker brings to the table (pun intended).
If space is tight in your kitchen, check out our guide, How to Organize Your Kitchen Like a Pro.
Save Time
By combining temperature and pressure, a pressure cooker can reduce cooking time by as much as two-thirds of conventional cooking. Imagine preparing dried beans (without soaking) in as little as an hour. Also, vegetables and smaller cuts of meat and poultry can be used without defrosting, making last-minute meal planning a breeze. Yes, it’s true you need to account for the time for the cooker to come up to pressure, the actual cook time, and the release time. But since this happens without your assistance, you can be preparing side dishes or setting the table.
| Pressure Cooker (High) | Oven/Stove | Slow Cooker (High) | Slow Cooker (Low) |
|---|---|---|---|
| 12 min | 15-30 min | 1-2 hours | 4-6 hours |
| 18 min | 30-60 min | 2-3 hours | 5-7 hours |
| 24 min | 1-2 hours | 3-4 hours | 6-8 hours |
| 30 min | 2-4 hours | 4-6 hours | 8-12 hours |
Saves Money
Studies have shown that cooking in a pressure cooker consumes 50 – 70% less energy. Compare preparing a pot roast in the oven at 300°F for 2-3 hours vs 1 hour in a pressure cooker. Not to mention the heat radiating into your kitchen from your oven during the summer months will increase your A/C bills.
Since pressure cookers are great at breaking down connective tissues and protein fibers, using cheaper cuts of meat like flank steak or chuck roast is no problem. They still end up moist and tender and reduce your grocery bills at the same time.
This might be a stretch but since preparing a meal in a pressure cooker is so easy and can be done at the last minute, maybe it’ll cut down on eating out or ordering takeout. Just a thought.
Healthier
There’s some debate over whether preparing food in a pressure cooker preserves nutrients better than other methods. All cooking methods, to some degree, reduce the nutritional quality of food. Although there are opinions on both sides, it seems the vast majority feel it is superior to other methods due to shorter cooking times and lower temperatures. The Journal of Food Science released a study showing pressure cooking as superior to other methods at retaining vitamin C in broccoli. The famous health expert, Dr. Andrew Weil, gave it two thumbs up as well.
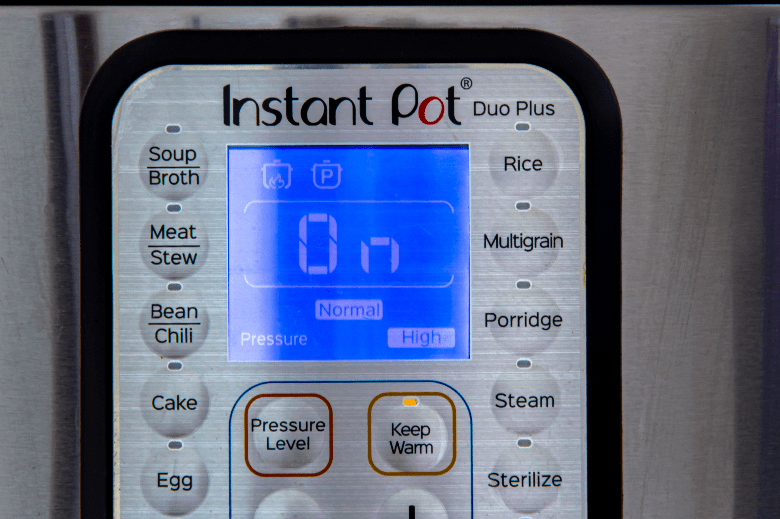
Versatility
Although stovetop pressure cookers are quite versatile, electric units are extraordinarily capable. Not only can they pressure cook, but most modern models can also replace your slow cooker, rice steamer, and can sear, sterilize, and saute. My Instant Pot Duo Plus has a button for soup, meat, beans, cake, eggs, saute, rice, multi-grains, steam, sterilize, and yogurt. Although the buttons make things simple, I’ve found that a bit of trial and error is necessary to get good results.
Convenient
Forgot about dinner and all you have is frozen meat? No problem. Add a few minutes to the cooking time and it’s all good.
Because a pressure cooker has an airtight seal, there’s no smell, unlike slow cookers or traditional cooking. Try working from home while slow cooking a chicken. By the time the chicken’s done, I’m not hungry because I’ve spent the day cleaning out the frig!
I’m a big fan of minimal cleanup. With a pressure cooker, you have just one pot to deal with, and with a little ingenuity, you can cook 2 or 3 different items at the same time, as long as they have similar cooking times.
Disadvantages
Of course, not everything is sunshine and lollipops. There are some shortcomings to cooking with pressure cookers. For starters, since the unit is sealed during the cooking process, you can’t check on, season, taste, or add ingredients until the dish is done. Just because you CAN cook something in your Instant Pot, doesn’t mean you SHOULD.
There are some foods that are best left to other methods. Breaded meats and vegetables are a “no go” due to the added moisture from the steam. This causes the breading to become soggy and fall off the food. In fact, anything that you want crisp is not for the pressure cooker. Also, never try and deep fry foods in a pressure cooker. Standard pressure cookers cannot heat oil to a high enough temperature for it to boil.
You’ll find plenty of Instant Pot recipes for pasta dishes like mac and cheese or pasta primavera which I’m sure can turn out great but I’ve found it’s challenging to get good results. The pasta has a tendency to cook unevenly and be a bit gummy. Your mileage may vary.
Overcooking can also be a problem, especially with foods needing short cooking times. I would stay away from seafood, delicate cuts of meat, or anything that requires less than 20 minutes when cooking conventionally.
A lot of people ask about canning using a pressure cooker. Canning requires precise temperature control to prevent botulism. Since you can’t monitor the temperature it’s simply not worth the risk.
In the next section, I’ll go over the best uses for a pressure cooker. Some experimentation and a dollop of common sense go a long way. Do I really need to dissuade you from baking bread or cookies in a pressure cooker? Really?
Cooking
Best Uses
Although you can cook just about anything in a pressure cooker, where they really shine is preparing foods quickly, that normally takes a long time, while retaining moisture and flavor. Let’s take a look at some examples.
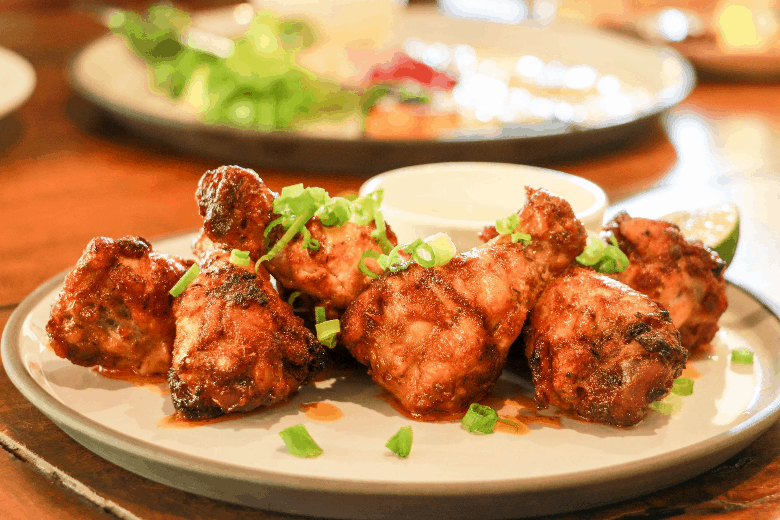
Chicken
Cook a 5 lb chicken in 30 minutes with a natural release of 20 minutes, and you’ll have juicy, “fall off the bone” chicken meat for salads, sandwiches, you name it.
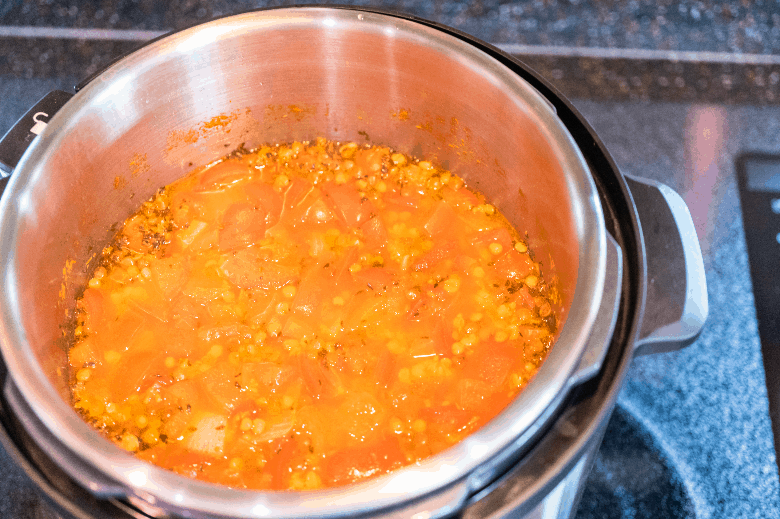
Soups, Stews & Stock
Why spend hours simmering, checking, and stirring. Throw everything into the cooker, push a button or two, and walk away. Let’s not forget jellies, jams, and marmalades!
Squash
If your recipe calls for mashed or pureed squash and you dread having to peel and chop a raw squash, I have a solution. Cut it into quarters and steam it in your pressure cooker. Then just scoop the soft flesh from the outer skin.
Beans, Lentils, & Grains
When it comes to dried beans and lentils, the big advantage of using a pressure cooker is not having to soak them beforehand, sometimes up to 12 hours! Depending on the variety of legumes, a pound of dried beans can be cooked in 10 to 40 minutes. With most grains, once you account for the time to pressurize, cook, and release pressure, there’s not a lot of time saved. It’s more the “hands-off” nature of the process that’s appealing.
Tough Cuts of Meat
Tenderizing meat is what a pressure cooker was “born” to do. It can break down all that connective tissue similar to a slow cooker but in a fraction of the time. Just don’t overdo it. Follow a good recipe and you’ll end up with a tender, flavorful cut.
Frozen Cuts of Meat or Poultry
No thawing or planning ahead necessary. It’ll take a bit longer to pressurize and cook, but that’s it.
Hard & Soft Boiled Eggs
Cooking hard-boiled eggs using my Instant Pot has been a revelation. They come out perfectly every time and they’re so easy to peel. I’ve never tried soft boiled eggs but others have told me of similar success.
Unique Cooking Issues
Because of a pressure cooker’s unique properties, there is a bit of a learning curve. Let’s discuss a few of the most common issues.
Release Methods
When a recipe calls for a natural release or a quick release (or frequently a combination of the two), it’s referring to how you should release the pressure after cooking is completed. There are 3 possible release methods, natural, quick, and cold-water.
Natural release is simply letting the cooker cool down normally at the end of the cooking cycle. As the temperature drops, so does the pressure. A recipe might require a 10-minute natural release, meaning, let the pot sit for 10 minutes and then release the remaining pressure manually. Keep in mind that although the cooking cycle might be complete, your recipe will still continue to cook during a natural release. While this may be fine for robust foods like meats and beans, delicate vegetables might turn to mush.
A quick-release is simply opening up the pressure valve and releasing the pressure immediately. This is used for quick-cooking foods where overcooking is a concern.
A cold-water release is placing the pressure cooker in the sink and either running cold water over it or immersing the pot in cold water to cool it down and reduce the pressure. This method is only appropriate for stovetop units. DO NOT try this with an electric model. The cold-water release has fallen out of favor in recent years with most cooks relying on using a quick release (opening the pressure release valve) since they both serve the same purpose.
Halving or Doubling a Recipe
There seems to be a lot of confusion about adjusting the cooking time when halving or doubling a recipe. So, let’s get some answers. The short answer is, most of the time there’s no need to change your cooking time. For example, you’re baking potatoes in the oven. Does the cooking time change depending on whether you’re cooking one potato or eight potatoes? No, the heat of the oven surrounds each of the potatoes equally. How about if you’re cooking huge russet potatoes or small red potatoes? Yes, because the heat takes time to penetrate to the center of the potato and the larger it is, the longer it takes to cook. Pressure cooking is no different. Cooking time is only affected by the size of the item, not the quantity.
To simplify things, try and keep food sizes uniform. If you’re cooking 10 potatoes or cubes of beef in a stew, if they are all the same size, they will all be cooked consistently.
Of course, nothing is simple so there are a few issues that I need to discuss. For a pressure cooker to work, it needs a minimum amount of liquid in order to generate pressure. For most units that’s around 1 – 1 ½ cups. If you’re reducing the size of the recipe you never want to go below this minimum for any liquids included in the ingredients. If using a trivet to keep your food above the water, just use the normal amount regardless of recipe size.
When doubling (or tripling) the size of a recipe there are also things to keep in mind. If cooking anything that tends to foam such as grains or beans, never fill up the pot more than ½ way. This is to prevent potentially clogging the pressure relief valve in the lid. For everything else, no more than ⅔ of max.
Keep in mind that although your actual cooking time may remain the same, increasing your recipe quantity will increase the time it takes for your cooker to reach the desired pressure. During this phase your food is beginning to cook so if the recipe includes time-sensitive ingredients such as pasta or vegetables, you may need to reduce the cooking time a bit.
Altitude
If you live higher than 2,000 ft above sea level, you will need to adjust your cooking time. The boiling point of water at sea level is 212°F. As altitude increases, the boiling point decreases, lowering the temperature and increasing the cooking time. The rule of thumb is, increase cooking time by 5% for every 1,000 ft above 2,000 ft elevation. For example, If you live in Denver, which is a bit over 5,000 ft, you should increase cooking time by 15%. Here’s a chart to simplify things a bit.
| Elevation (ft) | % Increase | Multiply Cooking Time By | Boiling Point of Water |
|---|---|---|---|
| Sea Level | 212°F | ||
| 3,000 | 5% | 1.05 | 206°F |
| 4,000 | 10% | 1.10 | 204°F |
| 5,000 | 15% | 1.15 | 202°F |
| 6,000 | 20% | 1.20 | 200°F |
| 7,000 | 25% | 1.25 | 198°F |
| 8,000 | 30% | 1.30 | 196°F |
| 9,000 | 35% | 1.35 | 195°F |
| 10,000 | 40% | 1.40 | 193°F |
Care & Maintenance
Caring for your pressure cooker is no different than any other pot or appliance with a few exceptions. The lid’s rubber gasket can be removed and should be cleaned and inspected for stretching or cracking. Also, make sure the pressure relief valve is clear of any food or debris and cleaned if necessary.
Check with the manufacturer as to what parts can be placed in the dishwasher. If you own an electric unit, such as an Instant Pot or Ninja Foodi, the inner pot and lid can go in the dishwasher, the base containing the heating element and electronics should be wiped down with a damp cloth.
Dry completely before storing and place the lid upside down on top of the unit to allow airflow. This will prevent any smells or mold from developing. Some owners even sprinkle some baking soda in the pot just to be sure.
Related: How Do Air Fryers Work? Plus 5 Great Choices
Safety Tips
- Always read the instruction manual
- Never fill more than ½ full with any foaming foods that can clog the valve such as grains or beans
- Never attempt to remove the lid before all pressure is released (modern units have safety features to prevent this)
- Be careful when releasing pressure – steam burns
- Never use as a deep fryer
- Don’t leave unattended
Recipe Links
Here at Kitchenda, we’re focused on kitchen gear, we’ll leave the recipes to everyone else. That being said, I wouldn’t want to get you all revved up about pressure cooking without, at least pointing you in the right direction. I’ve put together some links for easy and delicious recipes from all over the web.
Because of the popularity of the Instant Pot brand, many of the links reference using the Instant Pot in the instructions. If you’re using a different brand or even a stovetop unit fear not, all of the recipes will work for you as well. Have fun checking them out.
General
These sites should keep you pretty busy trying out all of the delicious recipes from boeuf bourguignon to chicken curry.
- Taste of Home – 100 Pressure Cooker Recipes
- Amy + Jacky – Instant Pot & Pressure Cooker Recipes
- Brit + Co – 56 Easy Pressure Cooker Recipes Even a Beginner Can Make
- Real HouseMoms – 25 Recipes To Get You Started With Your Pressure Cooker
- Allrecipes – Pressure Cooker Recipes
- Instant Pot – 1,000+ Official Recipes
Vegan & Vegetarian
If plant-based eating is more your speed I’ve got you covered. Whip up some mushroom barley risotto or butternut squash & ginger soup for the family. They’ll gobble it up.
- Hip Cooking – 75+ Vegan-Friendly Pressure Cooker Recipes
- Holy Cow – Quick and Easy Vegan Recipes
- The Inspired Home – 7 Vegetarian Pressure Cooker Recipes To Add To Your Repertoire
- Peas and Crayons – 20 Vegetarian Instant Pot Recipes
Desserts
Desserts? In a pressure cooker? Yup. Does Double chocolate cheesecake or apple crisp sound good? How about creme brulee? You will be surprised at all the sweet treats you can conjure up. Just don’t blame me if you put on a few pounds.
- Food Network – 14 Easy Instant Pot Desserts You’ll Crave
- Pressure Cooking Today – 40+ Delicious Instant Pot Dessert Recipes
- Good Housekeeping – 22 Best Instant Pot Desserts That Take Easy Baking to a Whole New Level
Summary
Ever since I got my Instant Pot I find myself using it more and more. It’s fast, versatile, is “hands-off” while cooking, and requires minimal cleanup. It simplifies my life…and I like simple.